You can make a simple motor from a few items you probably already have in your home.
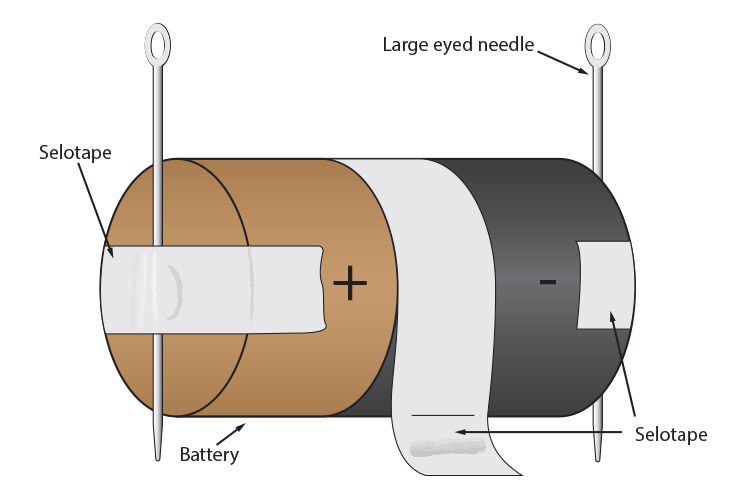
Take two large-eyed needles and sellotape them to the terminals of a battery. Also tape the battery down on a table:
Take some insulated wire, about a foot long, and wrap it around a thick pen as many times as you can, then remove it from the pen. Wrap the wire around the coil each side a few times to hold the wire together. Leave enough wire sticking out each side to reach the eyes of the needles.
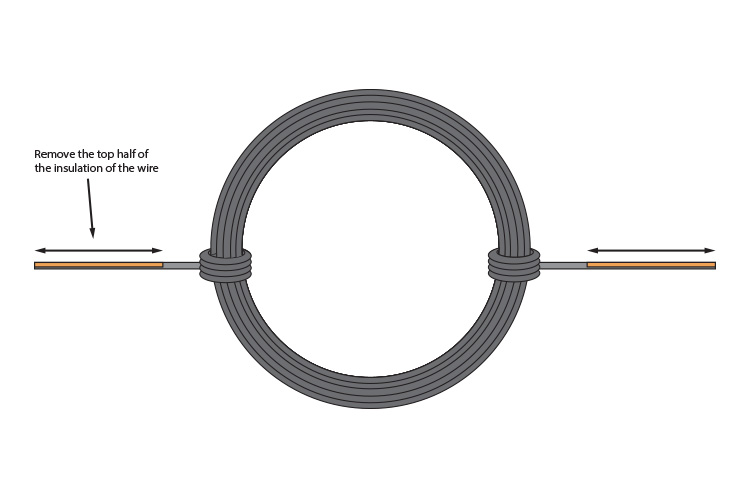
Now, with a scalpel, remove one side of the insulation from both ends of the wire – just enough to ensure that the needles' eyes will make contact with the copper wire.
In profile, this would look like this:
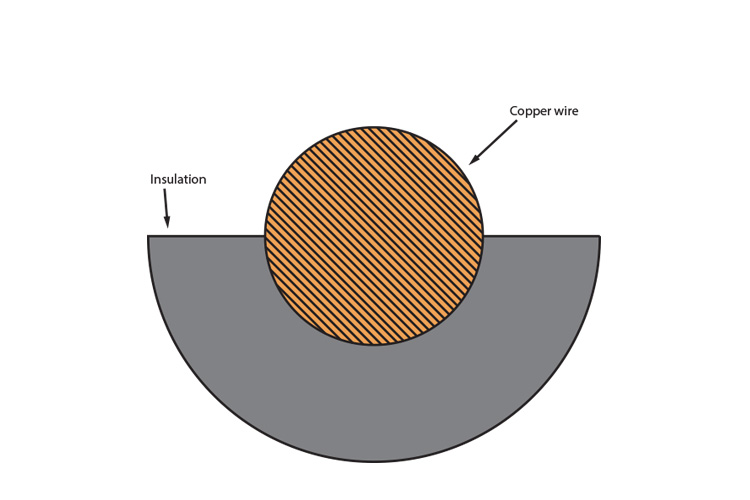
Thread the two ends into the two large eyes of the needles.
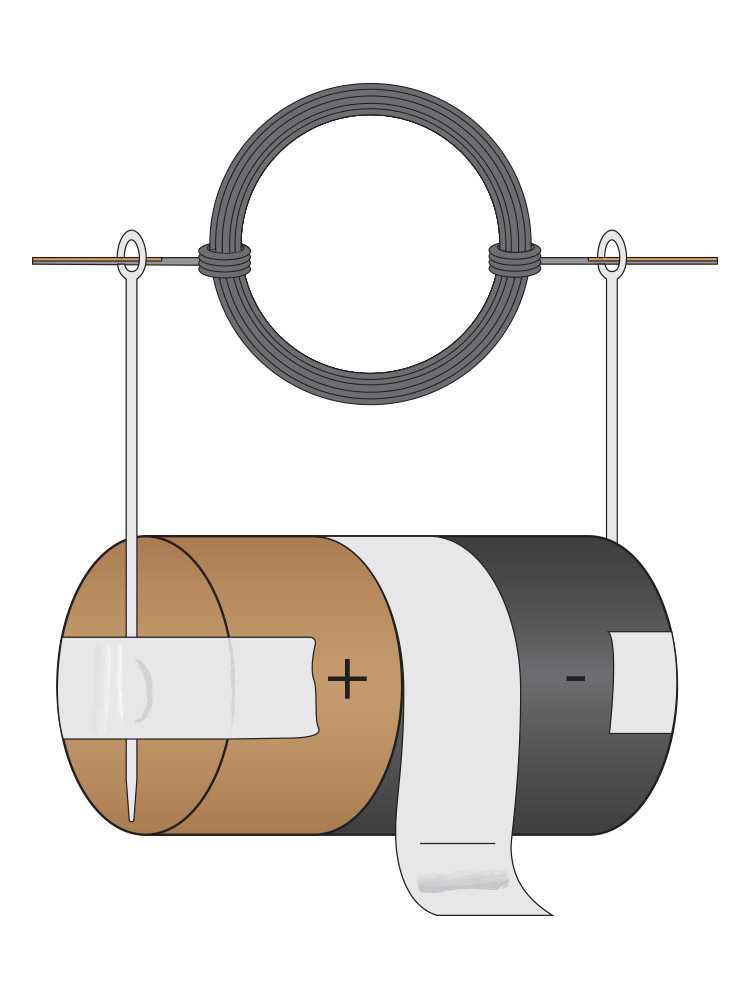
Now tape a magnet to the side of the battery, either north or south pole facing upwards.
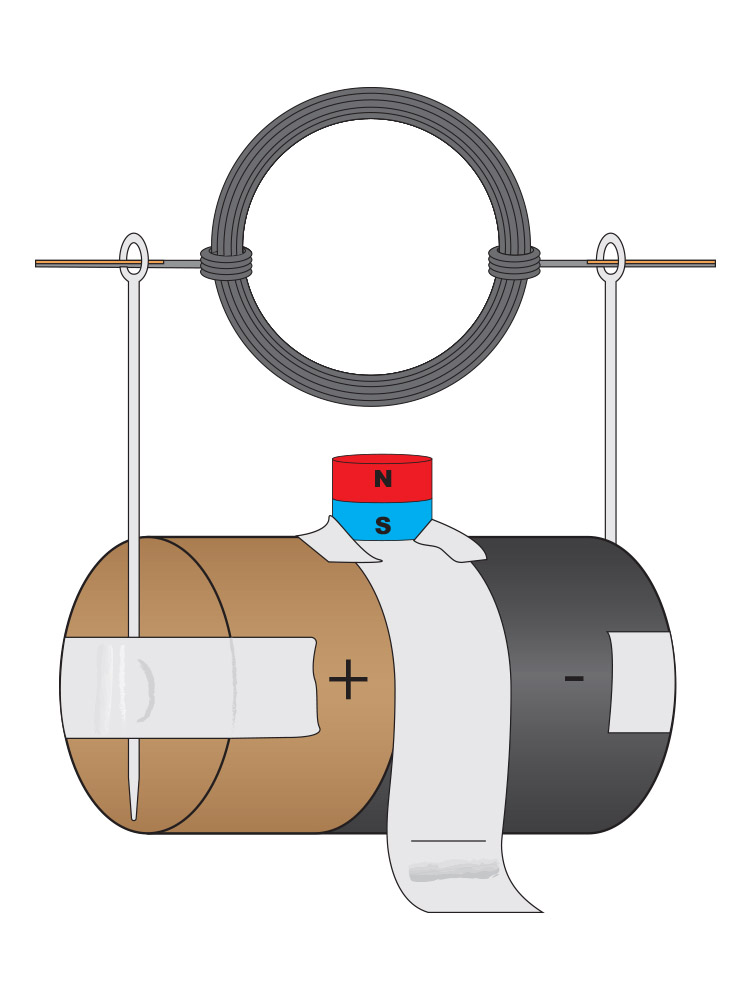
Now, if you start to spin the coil you will find it continues to spin. (The coil will only spin one way so if you start to spin it and nothing happens, spin it the other way.)
Why do we only cut half the wire?
Let's take one configuration of the coil and simplify it as below:
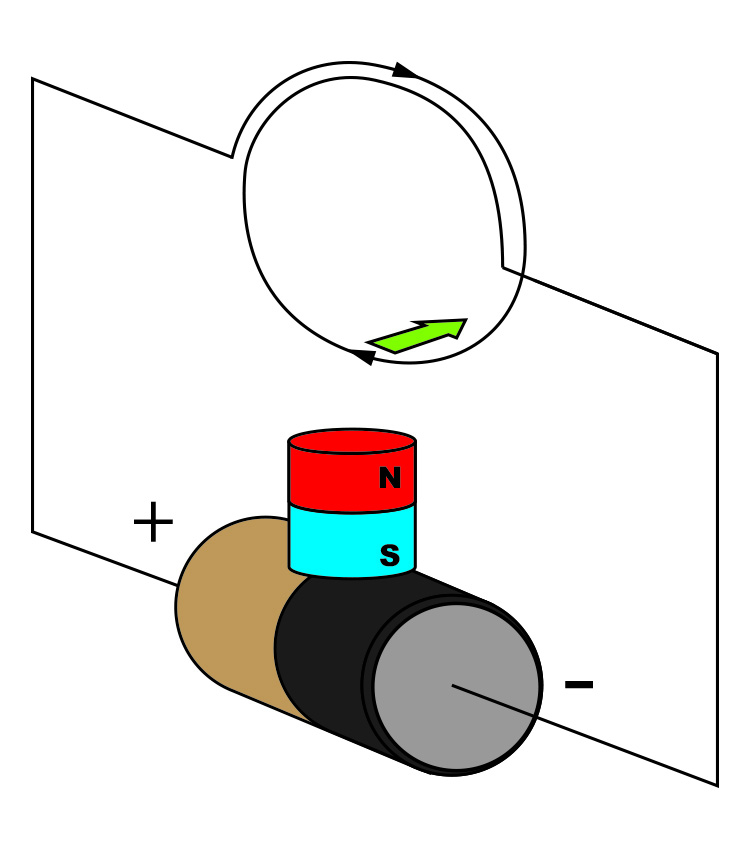
If we used Fleming's left-hand rule, the motion above would be that the bottom half of the coil moves away from us.
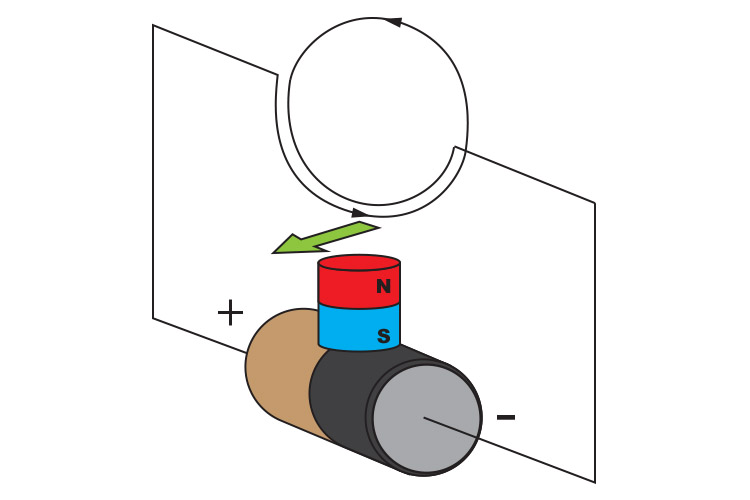
When the coil spins 180° (one half-turn) the force on the wire would be towards us.
The coil would stop.
A way to prevent this is to stop the current (electricity won't pass through the insulation) and no forces will operate on the coil for one half-turn. What gets the coil around the non-powered half of the turn is momentum.
No comments:
Post a Comment